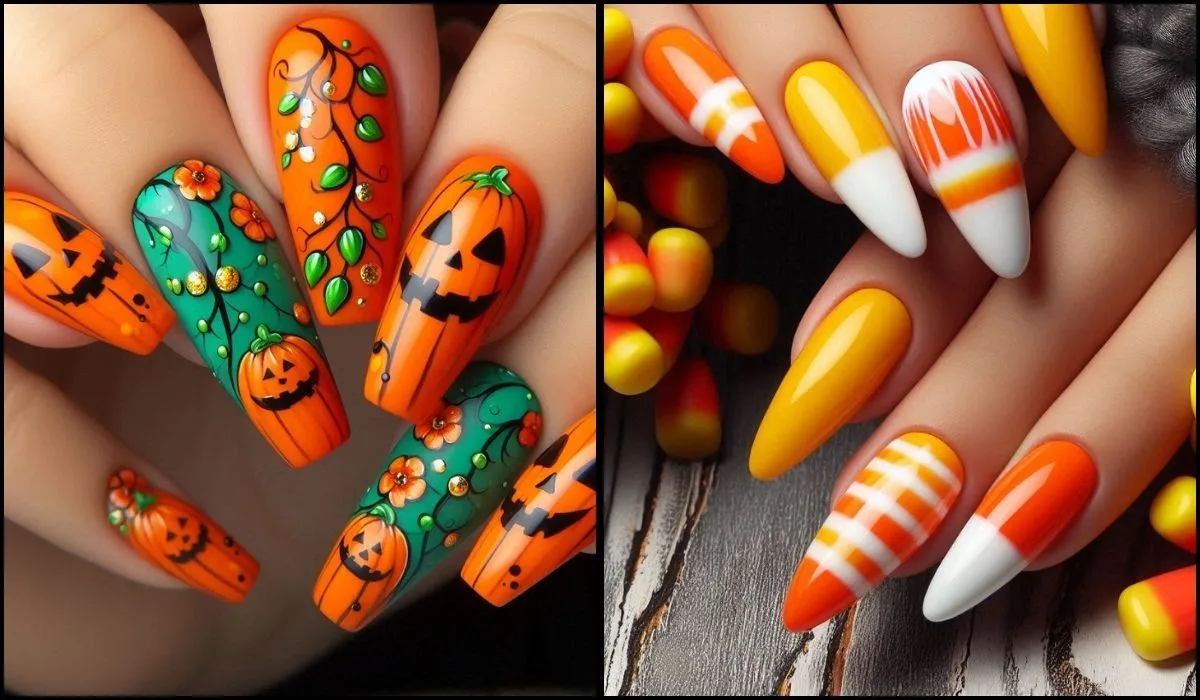
Halloween is a time for creativity, fun, and a little bit of fright! One of the most delightful ways to celebrate this spooky season is through Halloween-themed nail art. Whether you’re preparing for a costume party, heading out for trick-or-treating, or simply want to embrace the festive spirit, your nails can be a perfect canvas for your imagination. In this comprehensive guide, we’ll explore the history of Halloween nails, share a plethora of design ideas, offer tips for DIY nail art, and provide product recommendations to help you achieve stunning Halloween nails that are sure to turn heads.
The Evolution of Halloween Nails
While nail art has a rich history, Halloween nails have gained popularity in recent years with the rise of social media platforms showcasing creative designs. Traditionally, Halloween was all about costumes, decorations, and candy, but now, nail art has become an integral part of the celebration. It’s not just about looking festive; it’s a way to express your personality and creativity.
The Cultural Significance of Halloween
Halloween, with its roots in ancient Celtic festivals, has transformed over the centuries. Today, it’s celebrated with costume parties, haunted houses, and festive nail art. Many cultures have their own variations of this holiday, but the common thread is the celebration of the eerie and the playful. Nail art, particularly themed designs, allows individuals to partake in this festive spirit in a unique way.
Trending Halloween Nail Designs
Now, let’s dive into some exciting Halloween nail designs that will inspire your next manicure. From classic motifs to modern twists, these ideas cater to all skill levels and styles.
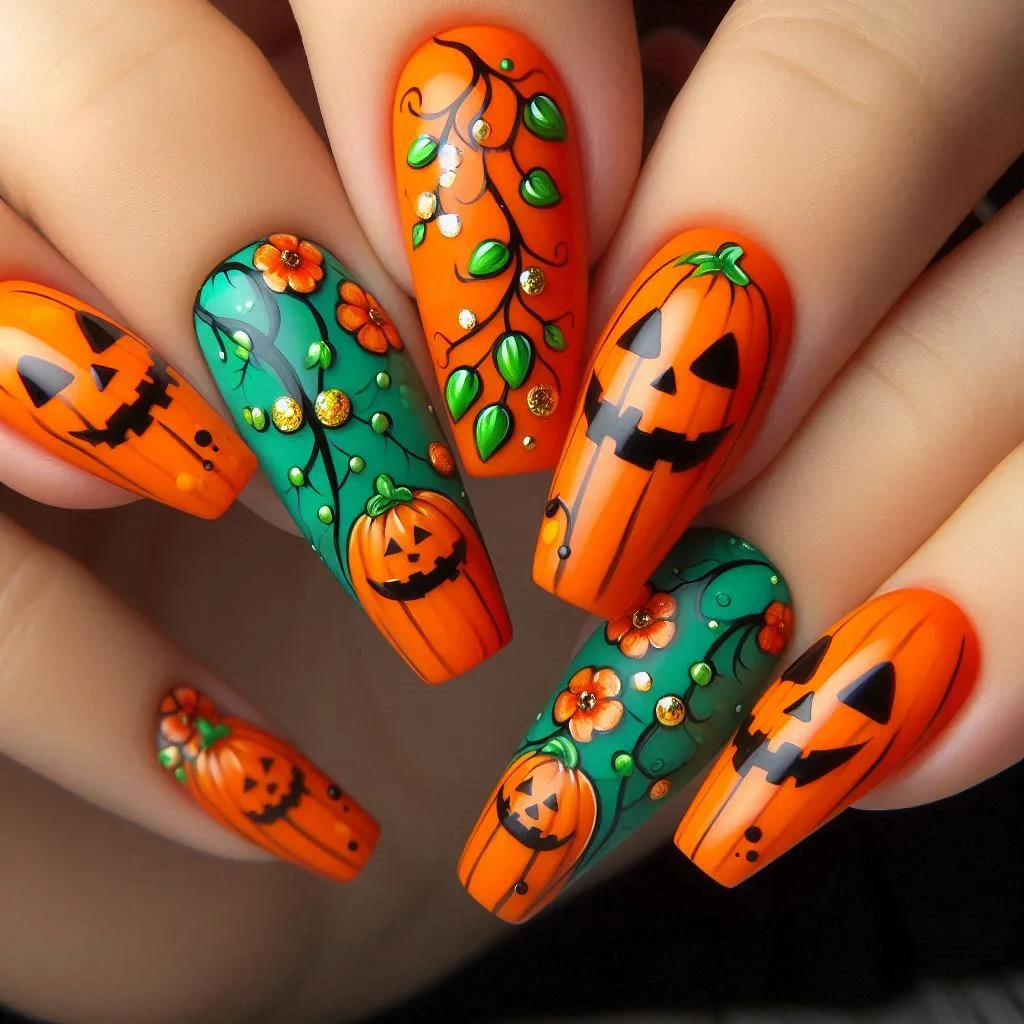
1. Classic Pumpkin Patch
Nothing embodies Halloween like a bright orange pumpkin! For this design, paint your nails a vibrant orange and add tiny green vines or smiling jack-o’-lantern faces.
How to Create It:
- Base coat: Apply a base coat for protection.
- Color: Paint your nails orange.
- Design: Use a fine brush or a dotting tool to create pumpkin faces and vines.
2. Spooky Ghosts
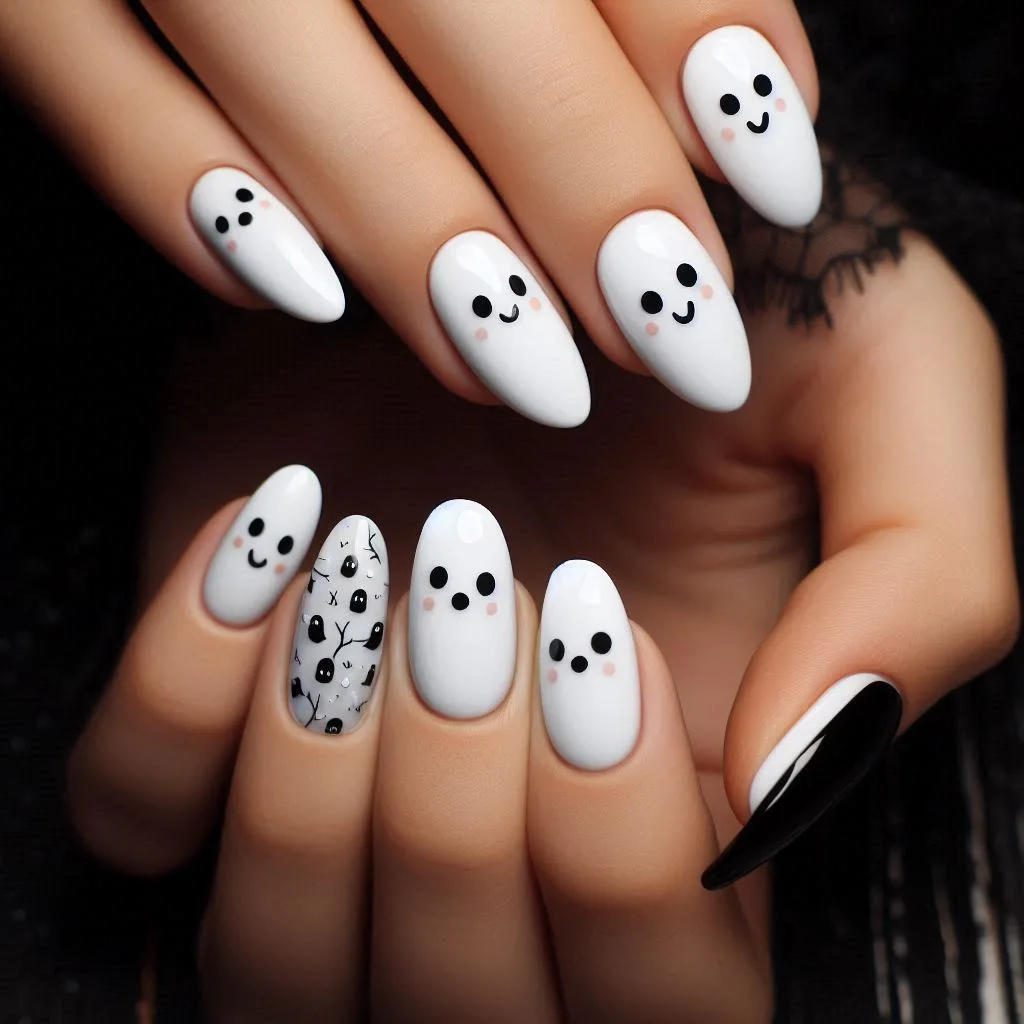
For a more playful take on Halloween, consider ghost designs. Use a white polish for the base, then add cute little ghost shapes with black eyes.
How to Create It:
- Base coat: Apply a clear base coat.
- Color: Paint nails white.
- Design: Use a dotting tool to create ghost shapes, adding eyes with a fine brush.
3. Blood Drip Tips
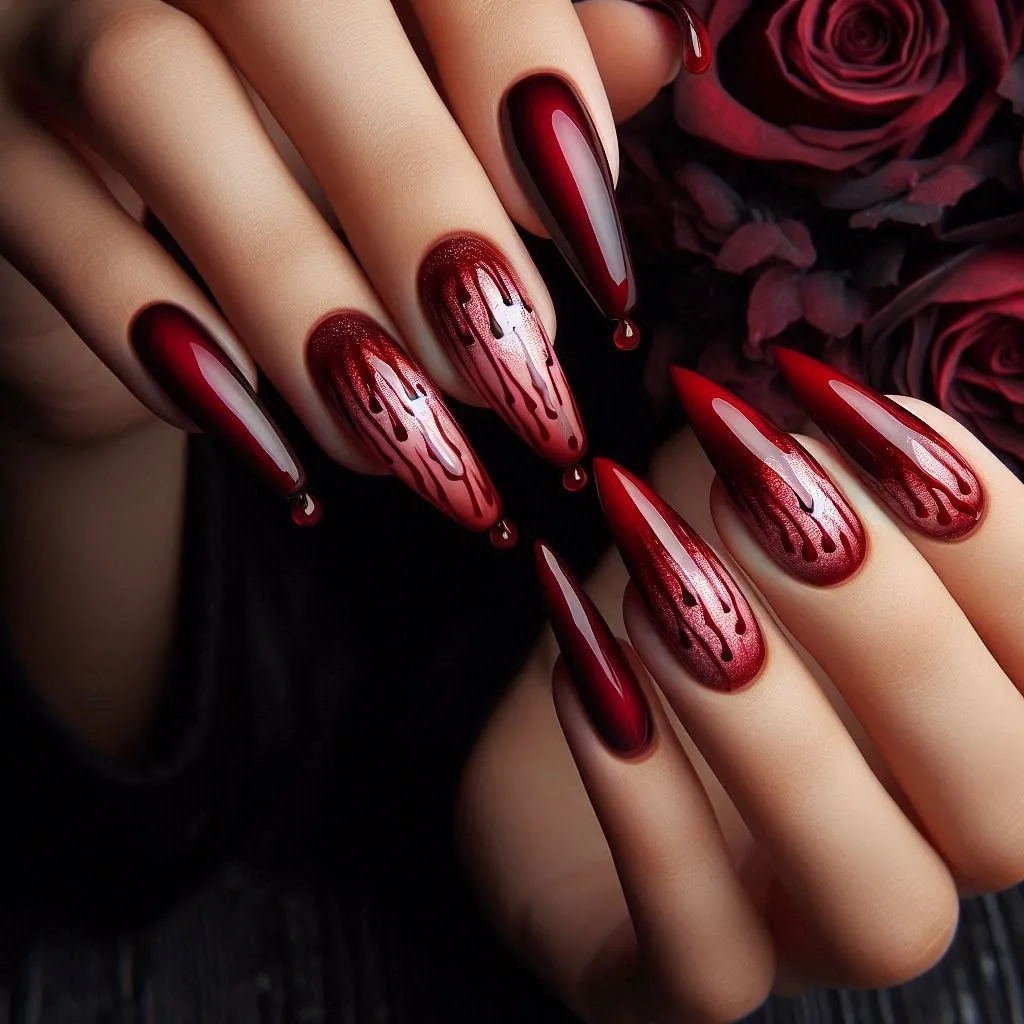
For those who prefer a more dramatic and edgy look, blood drip tips are perfect. This design mimics the appearance of dripping blood on the tips of your nails.
How to Create It:
- Base coat: Start with a base coat.
- Color: Paint your nails a bold red or black.
- Design: Use a red polish to create drip shapes at the tips.
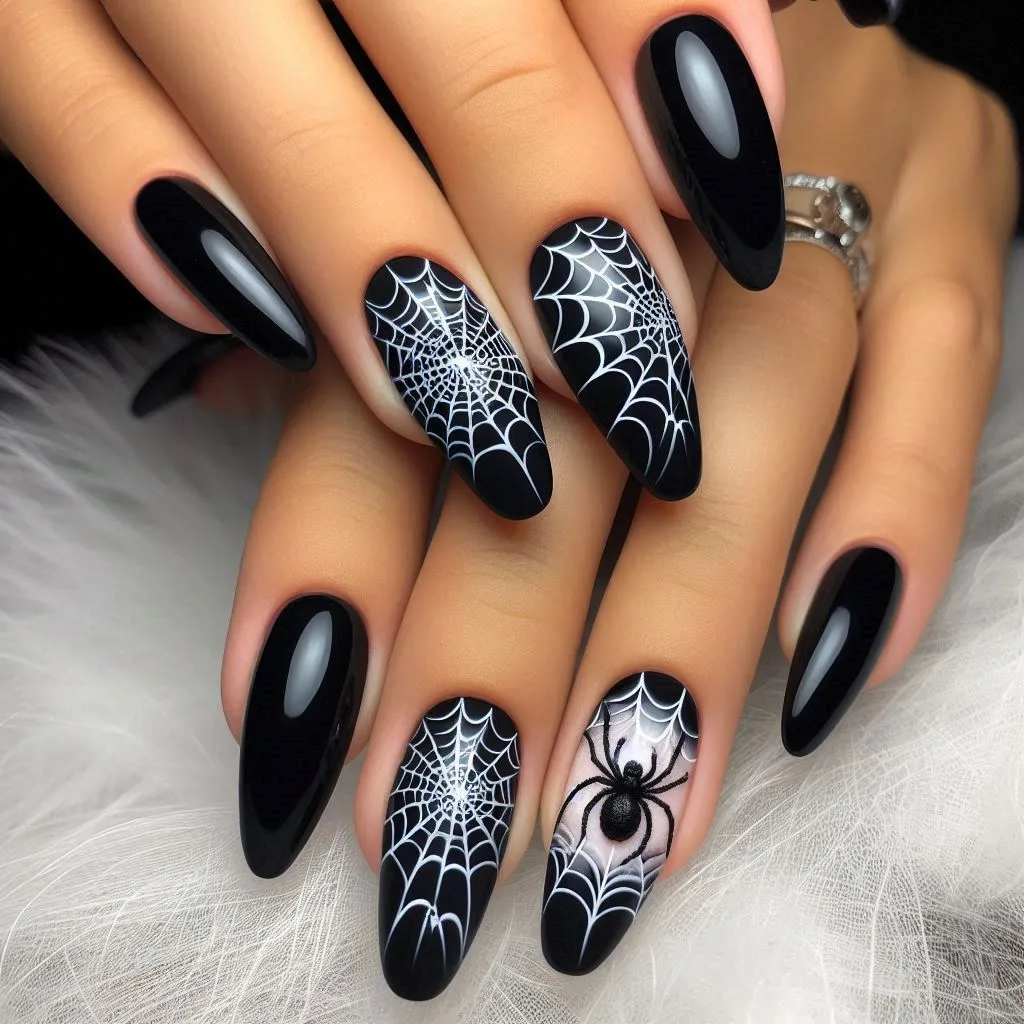
4. Spider Webs
Get intricate with spider webs! Start with a black base and use white polish to draw delicate spider webs, adding tiny spiders for extra creepiness.
How to Create It:
- Base coat: Apply a base coat.
- Color: Paint nails black.
- Design: Use a striper brush for the webs and add tiny spiders.
5. Glittery Halloween
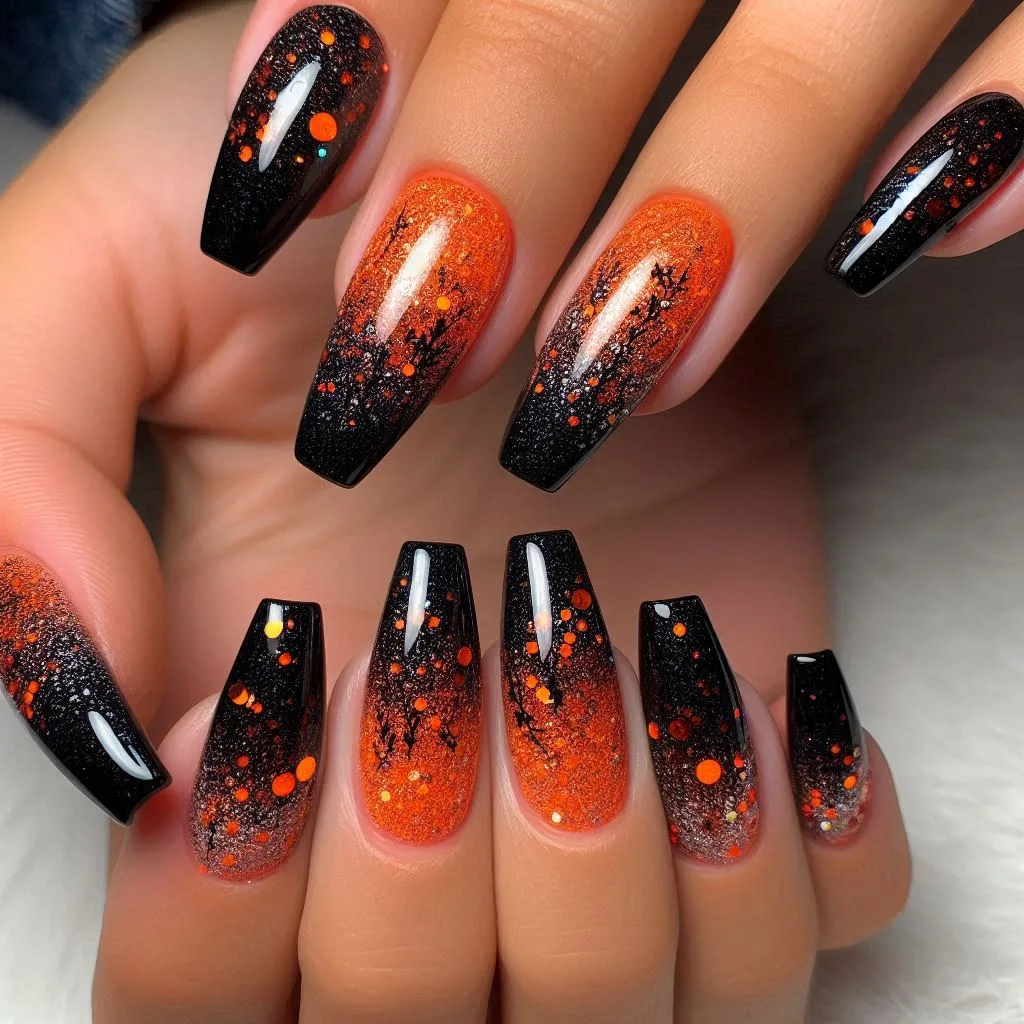
If you love sparkle, consider a glittery Halloween ombre. Combine black and orange glitter for a look that’s both festive and glamorous.
How to Create It:
- Base coat: Apply a clear base coat.
- Color: Use black polish for the base.
- Design: Gradually add orange glitter towards the tips.
6. Classic Witch’s Brew
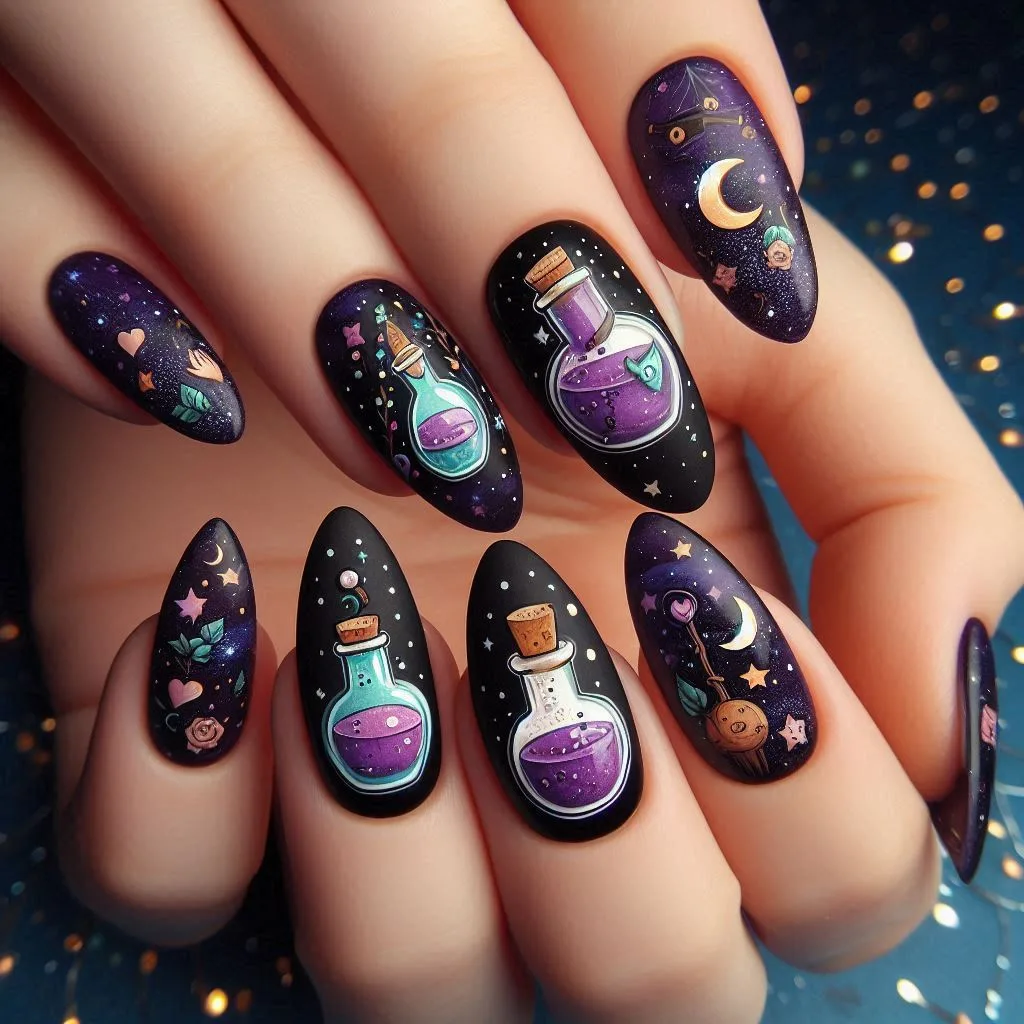
Channel your inner witch with a design that includes potion bottles, moons, and stars. This design is great for those who want something a bit more whimsical.
How to Create It:
- Base coat: Start with a clear base coat.
- Color: Paint nails a deep purple or black.
- Design: Use a fine brush to paint potion bottles and celestial designs.
7. Candy Corn Delight
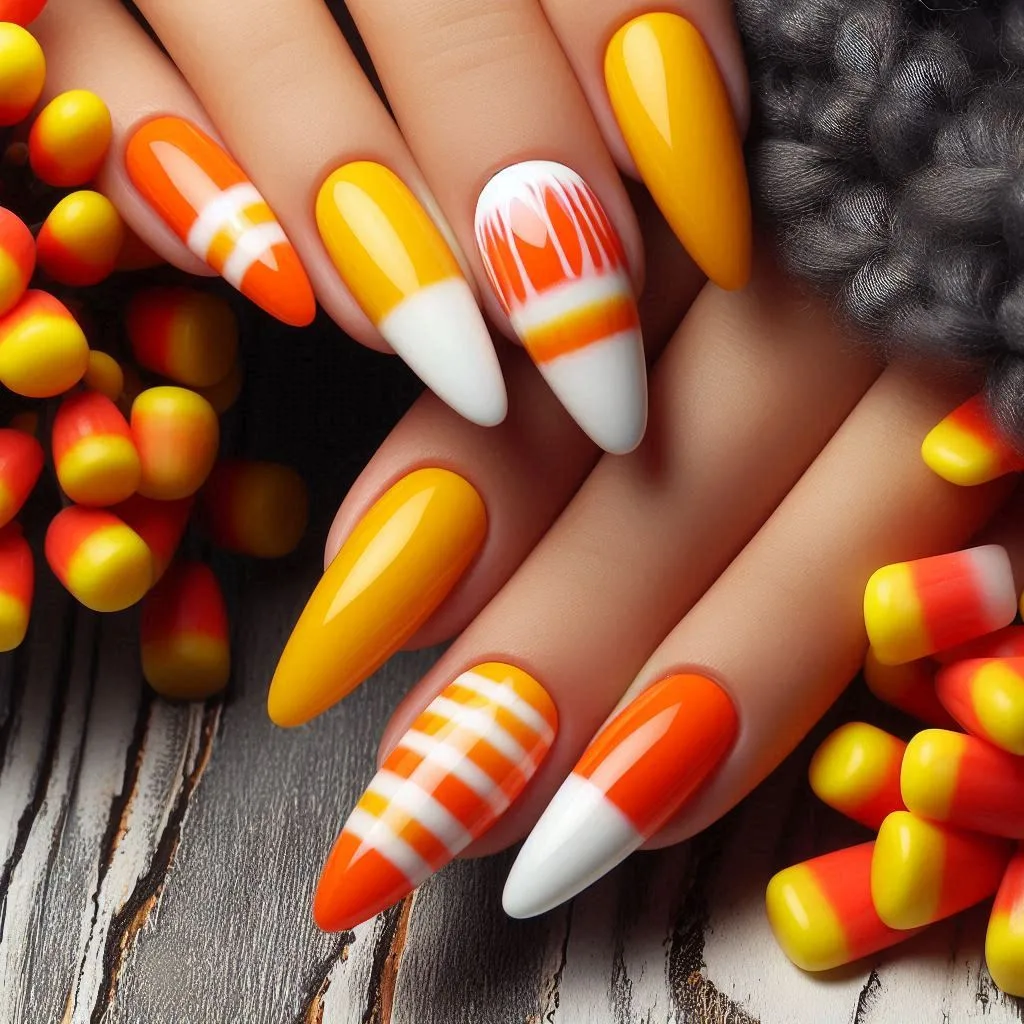
Embrace the quintessential Halloween candy with a candy corn nail design. This sweet treat can be mimicked with vibrant yellow, orange, and white stripes.
How to Create It:
- Base coat: Apply a clear base coat.
- Color: Divide your nails into three sections (yellow, orange, and white).
- Design: Use tape for clean lines or a small brush for freehand.
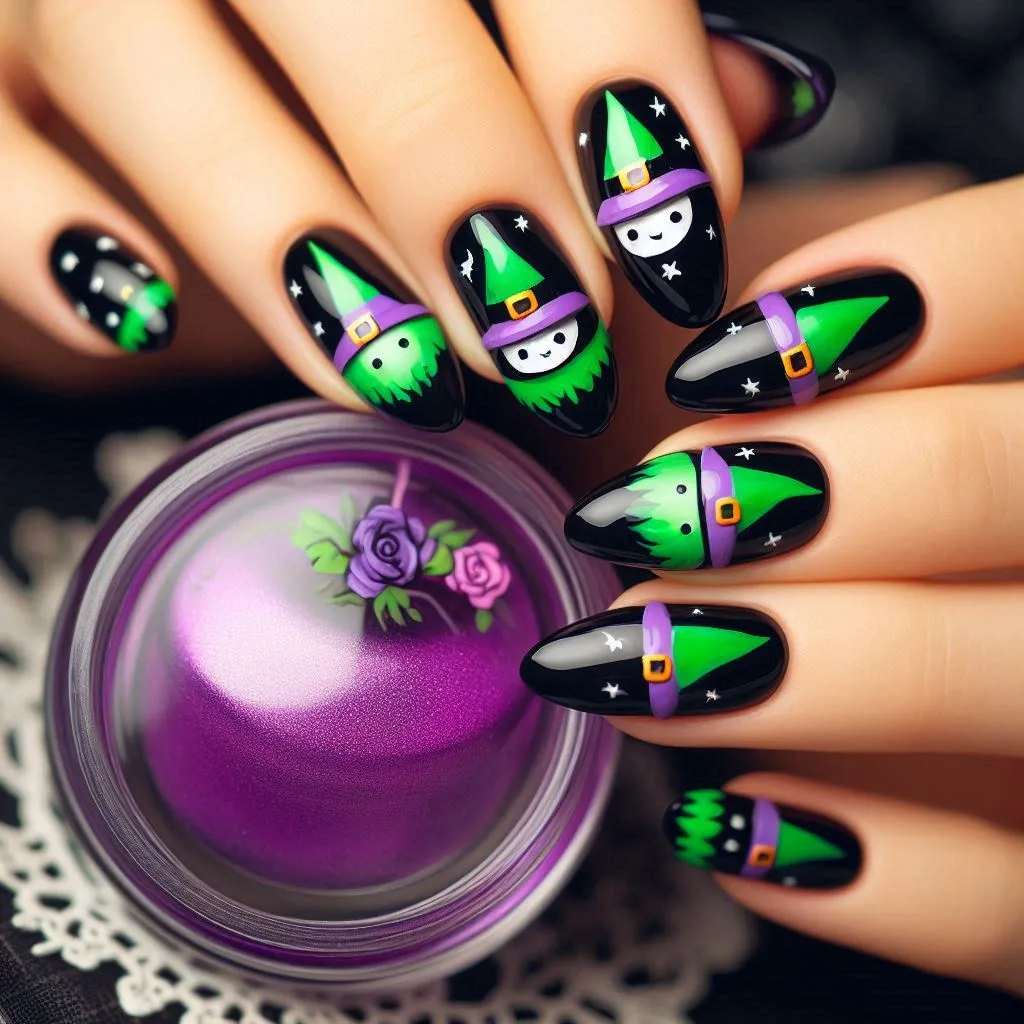
8. Witch’s Hat
A simple yet effective design features a classic witch’s hat. Use a black base with a little green or purple band.
How to Create It:
- Base coat: Start with a clear base coat.
- Color: Paint nails black.
- Design: Draw witch hats on each nail using a fine brush.
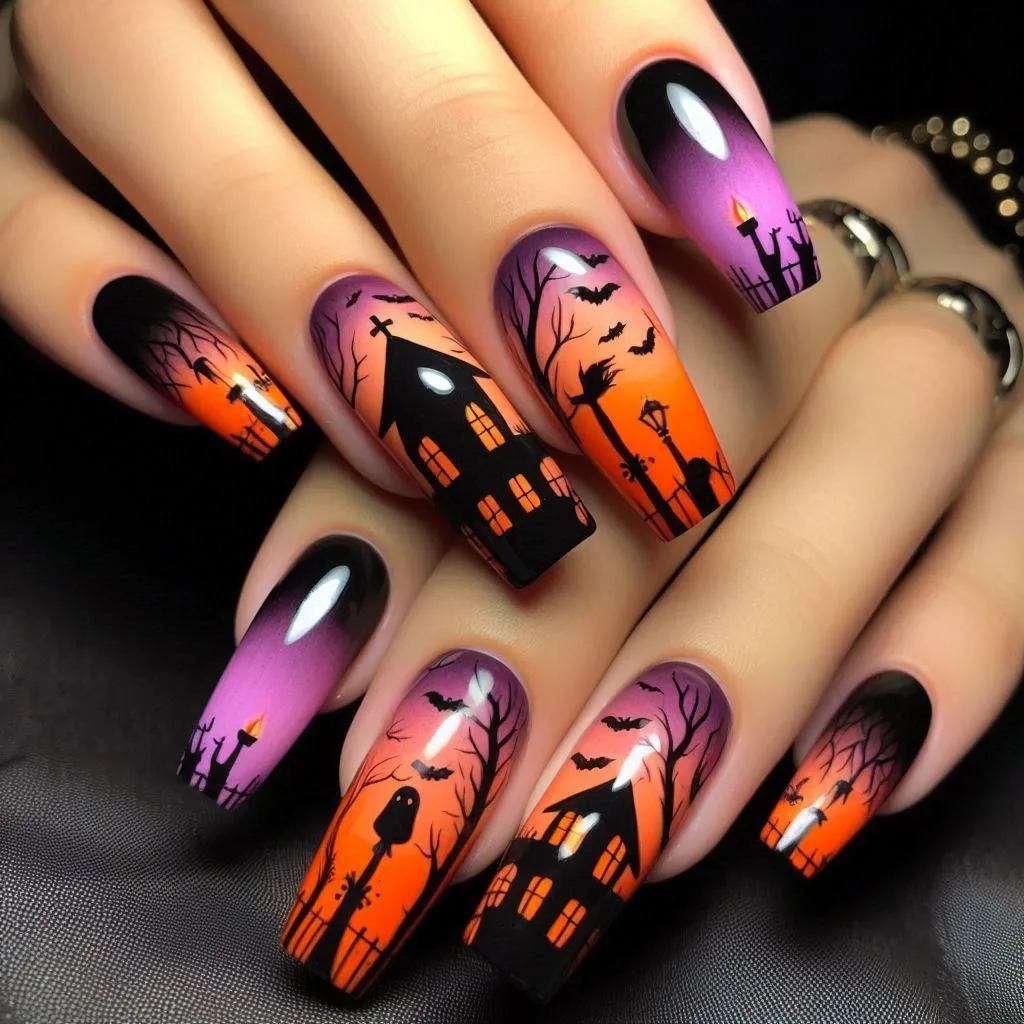
9. Haunted House Silhouettes
For a more artistic approach, try painting silhouettes of haunted houses against a gradient background.
How to Create It:
- Base coat: Apply a base coat.
- Color: Create a gradient using orange and purple.
- Design: Use black polish to paint haunted house silhouettes.
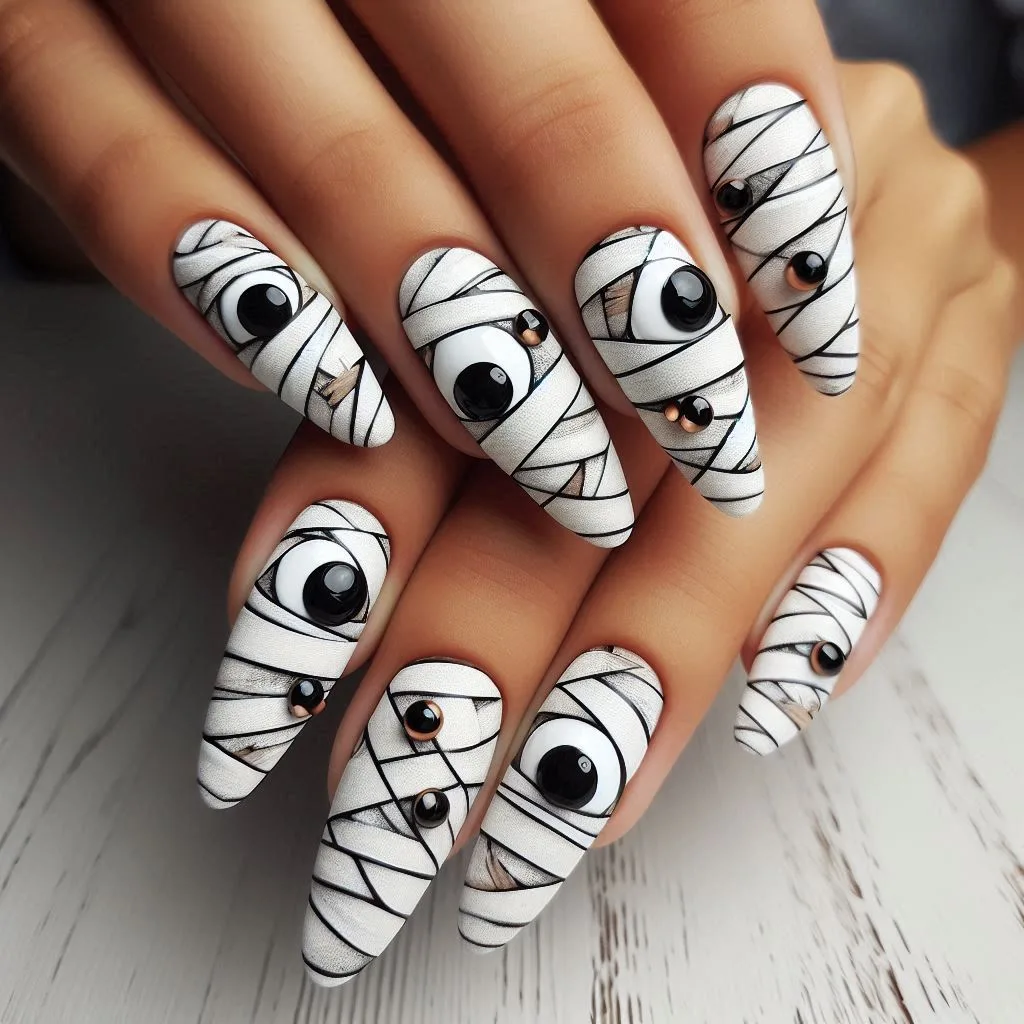
10. Mummy Madness
Wrap your nails in mummy-inspired designs using white polish and a little black for the eyes. This look is fun and easy!
How to Create It:
- Base coat: Apply a base coat.
- Color: Paint nails white.
- Design: Use a fine brush to create mummy wrappings and add eyes.
Tips for DIY Halloween Nail Art
Gather Your Supplies
Before diving into your Halloween nail art, make sure you have all the necessary supplies:
- Base coat and top coat: These are essential for protecting your nails and ensuring your design lasts longer.
- Nail polish: Choose a variety of colors, especially black, orange, purple, and white.
- Tools: Dotting tools, striper brushes, and nail tape can help you achieve intricate designs.
- Glitter and embellishments: Consider using glitter, rhinestones, or stickers for added flair.
Nail Care Tips
Taking care of your nails is crucial, especially when applying multiple layers of polish:
- Keep nails clean and trimmed: Regular maintenance prevents breakage and promotes healthy growth.
- Moisturize: Use cuticle oil to keep your cuticles hydrated.
- Give your nails a break: After Halloween, consider taking a break from polish to allow your nails to recover.
Practice Makes Perfect
If you’re trying a new design, practice first on a piece of paper or an old nail wheel. This will help you get comfortable with your techniques before applying them to your nails.
Consider Professional Help
If you’re not confident in your nail art skills, consider visiting a nail salon. Many salons offer themed nail art during the Halloween season and can create stunning designs for you.
Recommended Products for Halloween Nail Art
Nail Polishes
- OPI Gel Color: Known for its long-lasting wear and vibrant colors, OPI is a favorite among nail enthusiasts.
- Essie: With a wide range of shades and great formulas, Essie is perfect for seasonal nail art.
- Sally Hansen Miracle Gel: This gel polish provides a salon-quality finish without the need for a UV lamp.
Nail Art Tools
- Dotting Tools: These are essential for creating intricate designs like polka dots or detailed shapes.
- Striper Brushes: Perfect for fine lines and detailed work.
- Nail Tape: Helps achieve clean lines and geometric designs.
Nail Care Products
- Base and Top Coat: Brands like Seche Vite and Orly offer excellent options to protect your nails.
- Cuticle Oil: Regular use of cuticle oil keeps your nails healthy and hydrated.
Conclusion
Halloween nails are an exciting way to express your creativity and get into the festive spirit. From classic designs to intricate artwork, the possibilities are endless. Whether you choose to DIY or seek professional help, these spooktacular ideas will ensure your nails are the talk of the party.
This Halloween, let your nails shine just as brightly as your costume. With a little imagination and the right tools, you can create nail art that perfectly captures the essence of the holiday. So gather your supplies, pick a design, and get ready to unleash your inner artist!
Also Read:- 15 Stunning Bedroom Wallpaper Ideas to Transform Your Space

